
用labelme标注可见光红外行人重识别数据集
七崽爱吃小饼干2025/09/05阅读 4
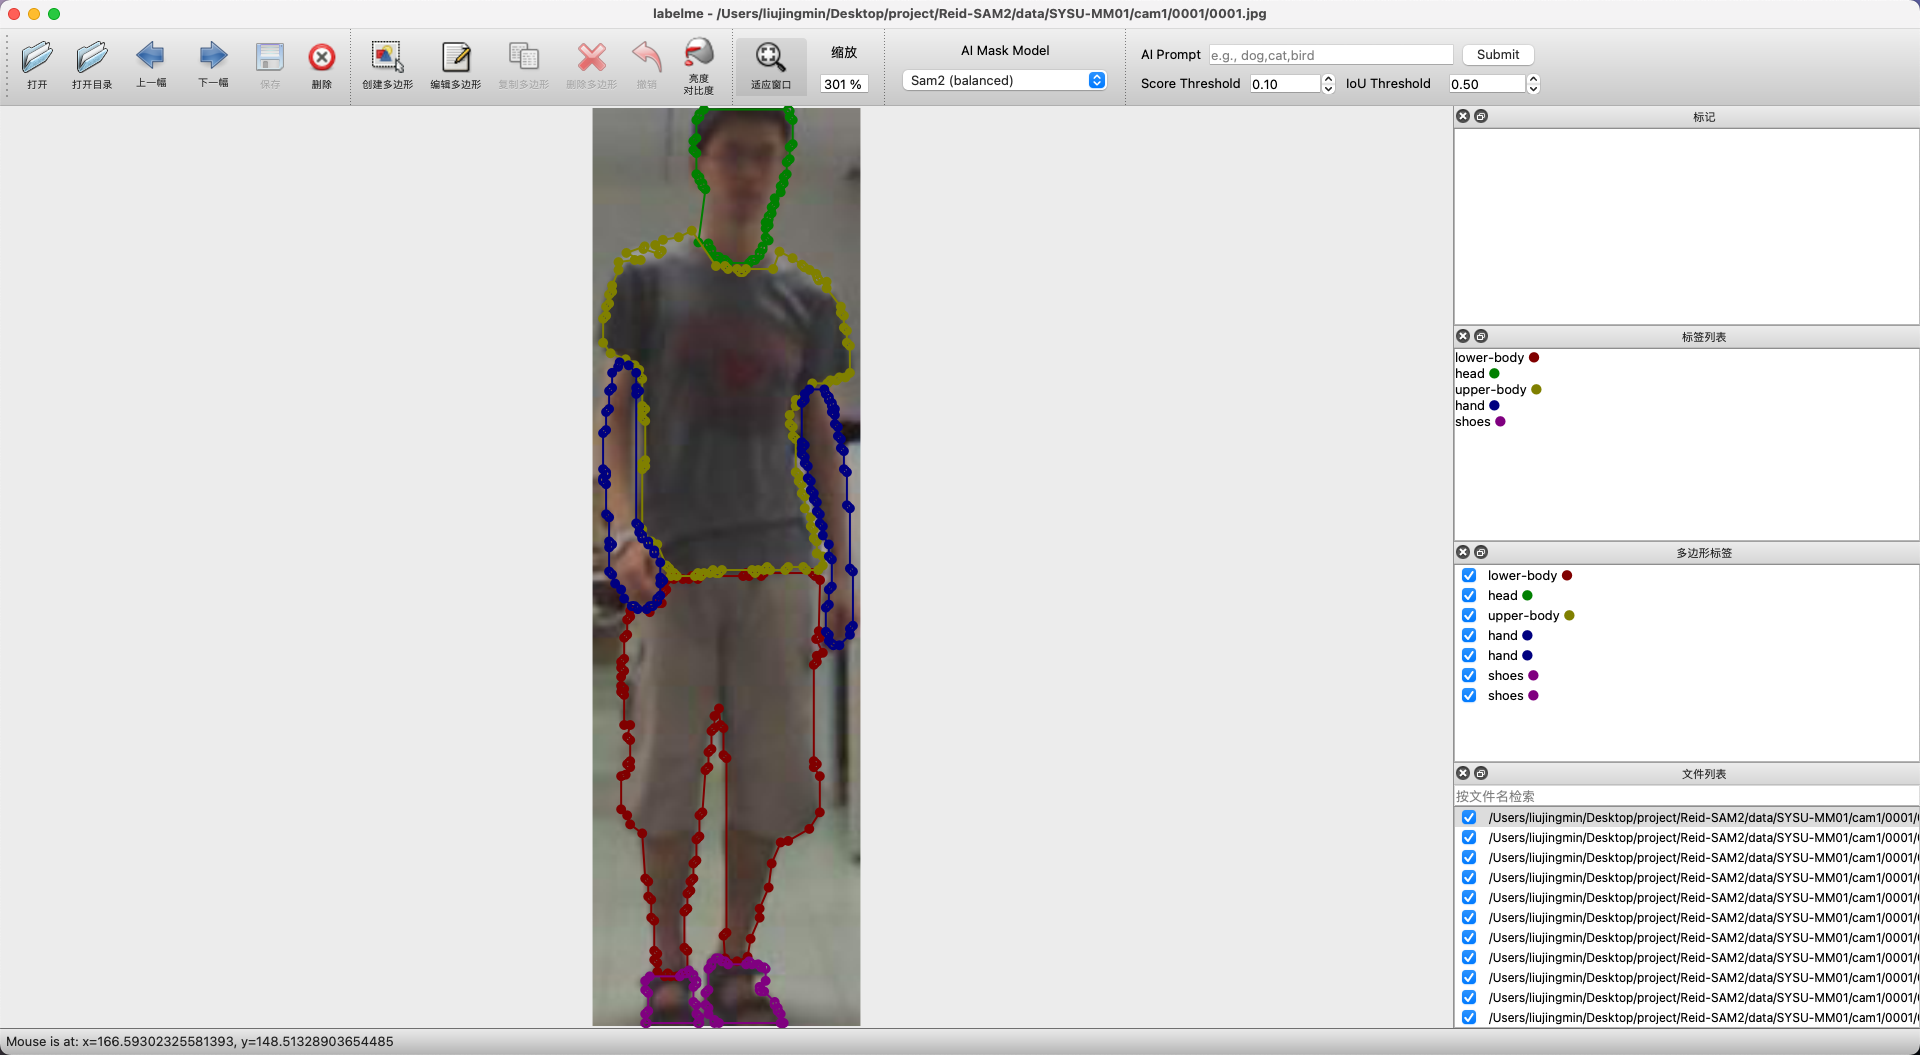
基于SYSU-MM01数据集进行标注,标注的标签有:
- head
- upper-body
- hand
- lower-body
- shoes
通过labelme的ai多边形功能辅助标注,该功能基于SAM,通过提示点可以快速进行语义分割,如果有分割的不好的地方再手动使用多边形进行分割。分割后的数据会以json的形式保存。
下面写了一段脚本用于将json文件转换为带标注的原图和掩码图片:
python
import json
import os
from PIL import Image, ImageDraw
import numpy as np


def json_to_image(json_path, output_dir=None):
    """
    将labelme标注的JSON文件转换为可视化图片和掩码,不同标签使用不同颜色
    :param json_path: JSON文件路径
    :param output_dir: 输出图片目录(默认与JSON同目录)
    """
    # 为每个标签定义不同的颜色(边框色、填充色)
    # 格式: {标签: (边框RGB, 填充RGBA, 掩码灰度值)}
    label_colors = {
        'head': ((255, 0, 0), (255, 0, 0, 50), 64),  # 红色
        'upper-body': ((0, 255, 0), (0, 255, 0, 50), 128),  # 绿色
        'lower-body': ((0, 0, 255), (0, 0, 255, 50), 192),  # 蓝色
        'hand': ((255, 255, 0), (255, 255, 0, 50), 32),  # 黄色
        'shoes': ((255, 0, 255), (255, 0, 255, 50), 224)  # 紫色
    }
    # 未知标签的默认颜色
    default_color = ((128, 128, 128), (128, 128, 128, 50), 1)  # 灰色

    # 读取JSON文件
    with open(json_path, 'r', encoding='utf-8') as f:
        data = json.load(f)

    # 获取原始图片路径和尺寸
    img_path = os.path.join(os.path.dirname(json_path), data['imagePath'])
    img = Image.open(img_path).convert('RGB')
    width, height = img.size

    # 创建输出目录
    if output_dir is None:
        output_dir = os.path.dirname(json_path)
    os.makedirs(output_dir, exist_ok=True)

    # 生成带标注的原始图片
    img_annotated = img.copy()
    draw = ImageDraw.Draw(img_annotated)

    # 生成掩码图片(不同标签不同灰度值)
    mask = Image.new('L', (width, height), 0)  # 'L'模式:0为黑
    mask_draw = ImageDraw.Draw(mask)

    # 遍历所有标注的多边形
    for shape in data['shapes']:
        label = shape['label']
        points = shape['points']  # 多边形顶点坐标列表

        # 获取该标签对应的颜色,如无则用默认色
        if label in label_colors:
            border_color, fill_color, mask_value = label_colors[label]
        else:
            border_color, fill_color, mask_value = default_color

        # 转换为整数坐标
        points = [(int(x), int(y)) for x, y in points]

        # 在原始图片上绘制多边形(带边框和半透明填充)
        draw.polygon(points, outline=border_color, fill=fill_color)
        # 在多边形附近绘制标签文本
        draw.text((points[0][0], points[0][1] - 15), label, fill=border_color)

        # 在掩码上绘制多边形(使用对应灰度值)
        mask_draw.polygon(points, fill=mask_value)

    # 保存结果
    base_name = os.path.splitext(os.path.basename(json_path))[0]
    img_annotated.save(os.path.join(output_dir, f'{base_name}_annotated.jpg'))
    mask.save(os.path.join(output_dir, f'{base_name}_mask.png'))

    print(f"已生成:\n{output_dir}/{base_name}_annotated.jpg\n{output_dir}/{base_name}_mask.png")


# 批量处理目录下所有JSON文件
def batch_convert(json_dir, output_dir=None):
    for file in os.listdir(json_dir):
        if file.endswith('.json'):
            json_path = os.path.join(json_dir, file)
            json_to_image(json_path, output_dir)

# 使用示例
# batch_convert('path/to/json_directory')


if __name__ == '__main__':
    # 替换为你的JSON文件路径
    json_file = '/Users/liujingmin/Desktop/project/Reid-SAM2/data/SYSU-MM01/cam1/0001'
    output_dir = '/Users/liujingmin/Desktop/project/Reid-SAM2/data/SYSU-MM01/seg/cam1/0001'
    batch_convert(json_file, output_dir)
转换的结果:
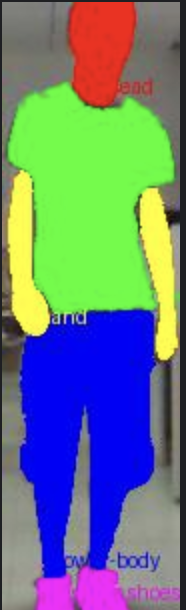
annotated.jpg
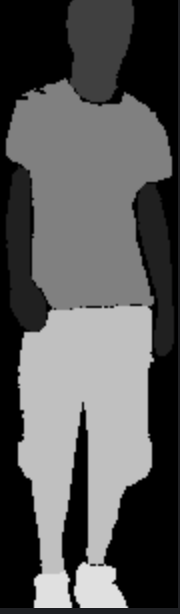
mask.png
- annotated.jpg(带标注的原图)
- 主要用于人工查看标注结果,方便直观地确认标注是否准确。它保留了原始图片的内容,同时叠加了标注的多边形区域,适合标注者自查或与他人沟通标注效果。
- mask.png(掩码图)
- 主要用于模型训练或后续算法处理。它是一张单通道的灰度图,通过不同灰度值区分不同的标注类别,便于计算机快速识别 “哪些像素属于哪个标签”。